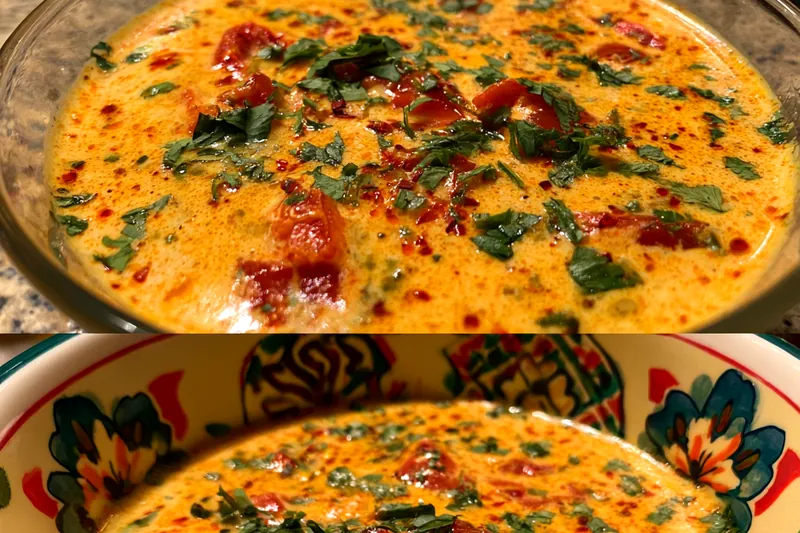
Cheesy Tomato Herb Dip
Cheesy Tomato Herb Dip is a delightful blend of creamy textures and vibrant flavors that make it a perfect snack for any occasion. This dip combines the richness of cheese with the freshness of herbs and the sweetness of tomatoes. Whether you're hosting a party or looking for a quick family snack, this recipe will become a favorite. Easy to prepare and packed with flavor, it's sure to impress your guests.


Why This Cheesy Tomato Herb Dip Recipe Works
This Cheesy Tomato Herb Dip stands out due to its creamy texture and rich flavor profile. The combination of cheeses with fresh herbs creates a depth of flavor that is both satisfying and exciting. Using high-quality ingredients ensures that every bite is delicious, and the dip pairs well with a variety of dippers.
The technique of layering the cheeses and baking until golden creates a crispy top that contrasts beautifully with the creamy base. This method not only enhances flavor but also makes the dip visually appealing, making it perfect for parties and gatherings.
💡 Professional Tip
For the best results, make sure to use room temperature cream cheese and sour cream to blend smoothly. Additionally, feel free to customize the herbs based on your preference – fresh thyme or cilantro work beautifully as well.
Frequently Asked Questions
Yes, you can prepare the dip a day in advance and store it in the refrigerator. Just make sure to cover it tightly with plastic wrap. When you're ready to bake it, let it sit at room temperature for about 30 minutes before putting it in the oven.
If you're looking for a lighter option, you can substitute Greek yogurt for cream cheese. This will give you a similar texture but with added protein. Alternatively, a dairy-free cream cheese can also work for a vegan version.
The dip is done when it is bubbly and the top is golden brown. You can check by inserting a toothpick into the center; it should come out clean and hot.
Freezing is not recommended for this dip as the creamy texture may change upon thawing. However, if you do freeze it, make sure to store it in an airtight container and consume it within 1-2 months for the best quality.
Serve this dip with tortilla chips, pita bread, or fresh vegetable sticks like celery and bell peppers. It's also delicious with crusty bread or crackers for a great snack platter.
The dip can last up to 3-4 days in the refrigerator when stored in an airtight container. Just reheat it in the oven or microwave before serving to restore its creamy consistency.
Yes, preparing the dip in advance is a great time-saver. Simply assemble it and store it in the fridge until you're ready to bake. This allows the flavors to meld together beautifully.
Reheat the dip in the oven at 350°F (175°C) for about 15-20 minutes until it's heated through and bubbly. You can also microwave it in short intervals, stirring in between to ensure even heating.
Recipe Troubleshooting Guide
Too Dry
Problem: The dip turns out dry instead of creamy.
Solution: Ensure you are using enough cream cheese and sour cream. If it's still dry, add a bit of extra sour cream or a splash of milk to achieve the desired creaminess.
Not Crispy Enough
Problem: The top layer of cheese doesn't get crispy.
Solution: Broil the dip for the last 2-3 minutes of baking to achieve a golden, crispy top. Just watch carefully to prevent burning.
Overcooked
Problem: The dip has dried out and lost its creamy texture.
Prevention: To prevent overcooking, keep an eye on the dip as it bakes and check periodically. Use a timer to help you monitor the cooking time.
Undercooked Center
Problem: The center of the dip remains cold or not fully melted.
Recovery: If you find the center is undercooked, lower the oven temperature and bake for a longer time, checking periodically until it is warm throughout.
Burnt Exterior
Problem: The dip's edge is burnt while the center is undercooked.
Prevention: Cover the dip with aluminum foil for the first half of the baking time to ensure even cooking without burning the edges.
Flavor Balance
Too Sweet: If the dip is too sweet, add a pinch of salt or a dash of lemon juice to balance the flavors.
Too Salty: Too salty? Add a bit more cream cheese or sour cream to dilute the saltiness.
Bland: If the dip tastes bland, increase the seasoning with additional herbs, garlic powder, or a touch of hot sauce for a flavor boost.
Essential Ingredients for Cheesy Tomato Herb Dip
The key ingredients for Cheesy Tomato Herb Dip are cream cheese, tomatoes, and a variety of fresh herbs. Each element contributes to the overall flavor and texture. Cream cheese provides the base richness, while tomatoes add sweetness and acidity, and herbs infuse freshness.
Using high-quality cheese and fresh herbs will elevate this dip. Ingredients like fresh basil and parsley not only enhance the flavor but also add a beautiful color. Opt for vine-ripened tomatoes for the best taste.
Essential Ingredient Notes
- Cream Cheese: Use full-fat cream cheese for a rich and creamy texture. Allow it to soften at room temperature before mixing to achieve a smooth consistency.
- Fresh Herbs: Fresh herbs like basil and parsley are crucial for flavor. Chop them just before adding to maintain their vibrant taste and aroma.
- Tomatoes: If using canned tomatoes, choose those without added sugars or preservatives. Fresh tomatoes should be ripe for the best flavor and sweetness.

Step-by-Step Cooking Process
The cooking process for Cheesy Tomato Herb Dip is straightforward and quick. Begin by mixing the cream cheese and sour cream until smooth, then incorporate the other ingredients. Baking allows the flavors to meld and the cheese to melt beautifully.
For perfect results, ensure that all ingredients are at room temperature before mixing. This will help achieve a consistent texture and prevent lumps in the dip. Baking until golden brown provides a delicious crispy top.
Key Technique for Perfect Cheesy Tomato Herb Dip
The most important technique is the layering of cheeses and proper baking time. This allows the dip to develop a crispy top while ensuring that the inside remains creamy and flavorful. Keep an eye on the baking process to achieve the perfect result.
Cheesy Tomato Herb Dip
📋 Ingredients
Main Ingredients
- 1 cup butterRoom temperature
- 1 cup heavy creamFor a richer dip
- 1/2 cup mayonnaiseAdds creaminess
- 2 cloves garlic, mincedFor flavor
- 1 tsp paprikaFor smokiness
- 1 tsp Italian seasoningEnhances flavor
- Salt and pepper to tasteTo season
For the Sauce
- 2 lbs chickenCut into pieces
- 1 cup diced bell peppersAdds crunch
- 1/2 cup chopped green onionsFor flavor
- 1/2 cup shredded lettuceFor garnish
- 1 can black olivesSliced
- 1 cup cornAdds sweetness
- 1/2 tsp cuminFor warmth
- 1/2 tsp chili powderFor heat
- 1/2 cup diced avocadoFor creaminess
Instructions
Prepare Ingredients
Start by gathering and measuring all your ingredients to ensure a smooth cooking process.
Mix Cream Cheese and Sour Cream
In a large bowl, combine the softened cream cheese and sour cream until smooth.
Add Cheddar Cheese
Stir in the shredded cheddar cheese and mix well until fully incorporated.
Incorporate Fresh Ingredients
Fold in the diced tomatoes, basil, and parsley until well mixed.
Season the Mixture
Add garlic powder, onion powder, salt, and black pepper, mixing until evenly distributed.
Spread in Baking Dish
Transfer the mixture into a greased baking dish, spreading it evenly.
Top with Mozzarella and Parmesan
Sprinkle the mozzarella and Parmesan cheese on top of the dip mixture.
Bake in Oven
Bake in a preheated oven at 350°F (175°C) for 30-35 minutes or until bubbly and golden brown.
Cool and Serve
Allow the dip to cool slightly before serving with your favorite dippers.
Recipe Notes & Tips
Storage Tips
Store any leftovers in an airtight container in the refrigerator. To maintain the dip's creamy texture, reheat gently before serving, and consume within 3-4 days.
Serving Suggestions
Serve this dip warm with tortilla chips, sliced baguette, or vegetable sticks. It also pairs well with a fresh salad for a more substantial appetizer.
Recipe Variations
Feel free to customize this dip by adding ingredients like cooked bacon, jalapeños for heat, or different cheeses such as gouda or pepper jack for a twist on flavor.